
Chocolate Peanut Butter Candy Bars

No-bake, chewy peanut butter bars layered with crisp cereal, thick chocolate, and your favorite bite-sized candies — an easy, crowd-pleasing treat.
This recipe for Chocolate Peanut Butter Candy Bars is one of those dessert shortcuts that tastes like you spent hours in the kitchen. I first put these together on a rainy weekend when I had a jar of supermarket creamy peanut butter and a desperate craving for something chocolatey and chewy without turning on the oven. The result is a dense, soft bar with bold peanut butter flavor, a pleasantly crisp cereal backbone, and a glossy chocolate-peanut topping studded with candy pieces for bursts of texture and extra sweetness. Every bite is rich and chewy — almost candy-like — which makes them dangerously easy to eat.
What I love most about this version is how flexible it is: you can mix and match the candy pieces to suit the crowd, and because it’s no-bake, the technique is forgiving. The base is bound with corn syrup and sugars which gives a chewy, slightly sticky texture that holds together well when sliced. The chocolate top creates a decadent contrast and the added candies make them playful and nostalgic — perfect for potlucks, school parties, or an after-dinner treat. These bars have become a go-to when I need something quick, impressive, and irresistibly peanut-butter-forward.
Why You'll Love This Recipe
- Fast and oven-free: ready to assemble in about 20 minutes and sets at room temperature in roughly 4 hours — ideal when you don’t want to turn on the oven.
- Pantry friendly: uses common ingredients like creamy peanut butter, cereal, sugar, and chocolate chips — no specialty stores required.
- Customizable: swap or add bite-sized candies (Reese’s, Rolos, Butterfinger Cups) for variety, texture, and flavor combinations.
- Make-ahead convenience: they store well at room temperature or in the fridge, and freeze beautifully for longer storage.
- Crowd-pleasing sweetness with satisfying chew: dense, slightly sticky interior balanced by a smooth chocolate-peanut topping and candy crunch.
- Simple technique: microwave melting and gentle packing — easy for kids to help with or for a quick dessert solution.
When I bring these to gatherings, people always ask for the recipe — they taste like a candy bar but come together faster and cheaper than store-bought varieties. I’ve watched picky eaters and chocolate lovers alike go back for seconds, and the candies on top always spark conversations about favorite childhood treats.
Ingredients
- Creamy peanut butter (bars): 1 heaping cup. I use Jif or Skippy for consistent texture and sweetness; avoid natural or homemade peanut butter, which separates and won’t give the same chewy binding.
- Light corn syrup: 1/2 cup. Corn syrup prevents crystallization and creates the dense, chewy mouthfeel that defines these bars.
- Granulated sugar: 1/2 cup. Adds structure and sweetness; it dissolves when heated with the syrup and peanut butter.
- Light brown sugar: 1/4 cup, packed. The molasses adds depth and a touch of caramel flavor.
- Vanilla extract: 1 tablespoon. Offers aromatic lift; use pure vanilla if possible but a quality imitation will work in a pinch.
- Special K cereal: 3 1/2 cups. Provides a light crispness and bulk without overpowering the peanut butter. Use the original variety for the best texture.
- Semi-sweet chocolate chips (topping): 1 3/4 cups. Melts smoothly into a glossy layer; use good-quality chips (Ghirardelli, Nestlé) for best finish.
- Creamy peanut butter (topping): 1/4 cup. Stirred into the melted chocolate for a silkier, peanut-buttered glaze.
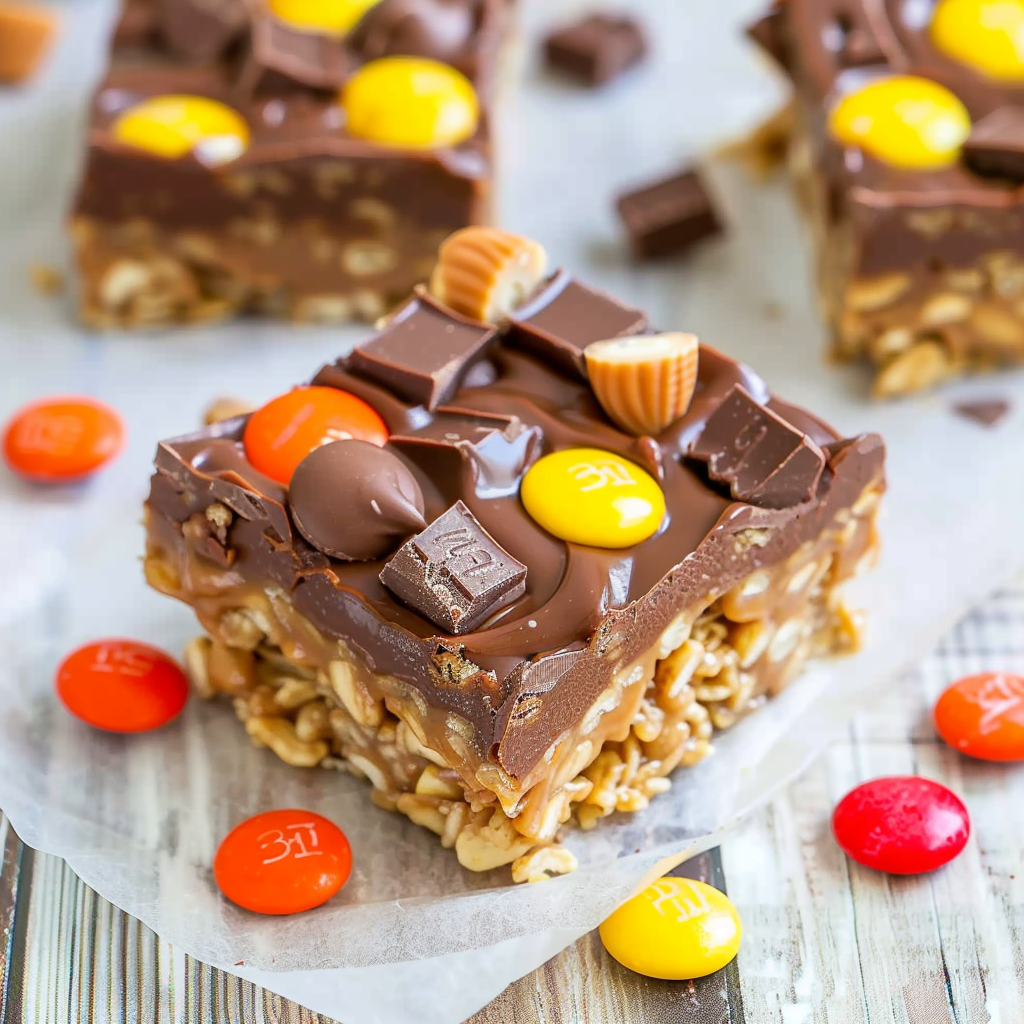
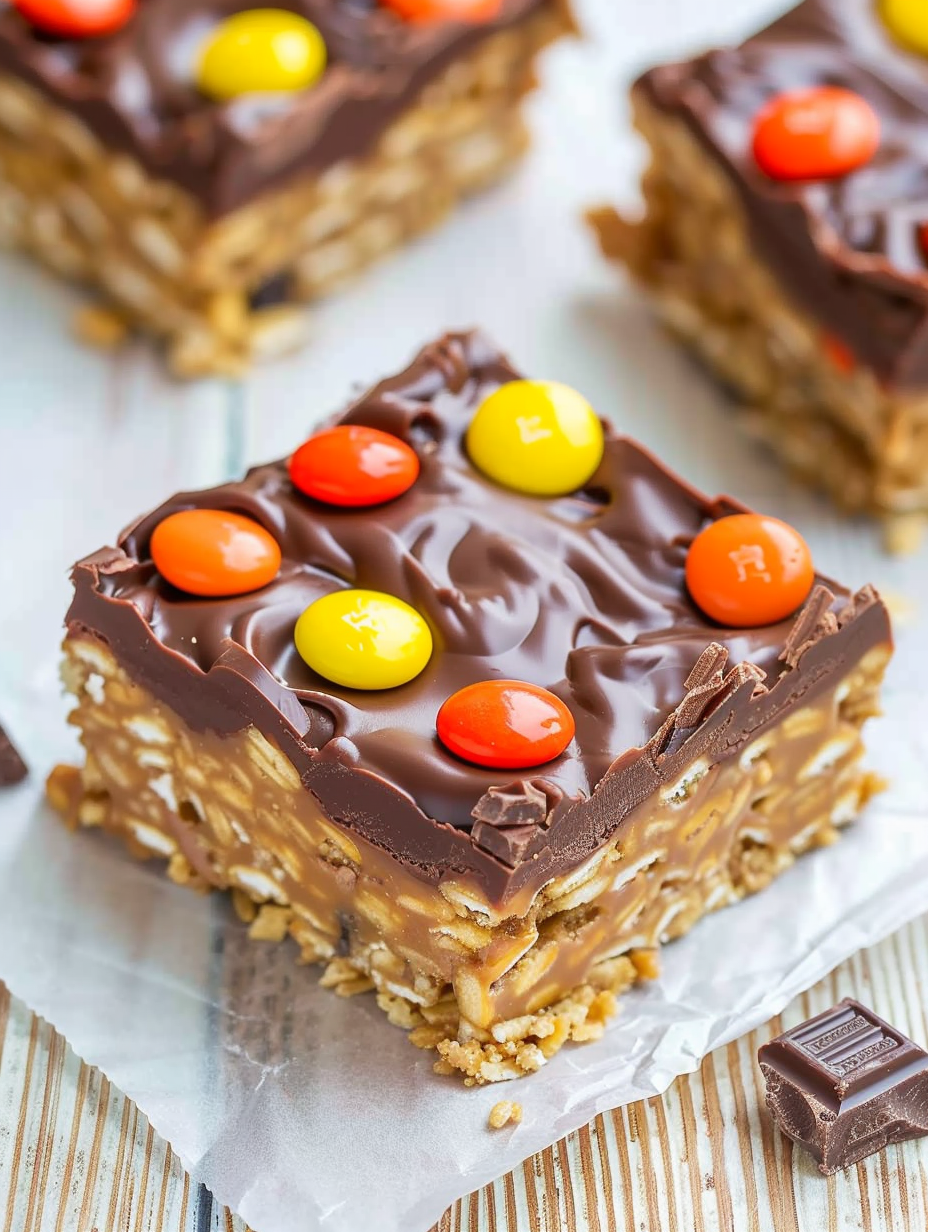
- Bite-sized candy pieces: about 1 cup. I used a mix of Rolo, mini Reese’s Peanut Butter Cups, Reese’s Pieces, and Butterfinger Cups — feel free to substitute your favorites.
Instructions
Prepare the pan: Line an 8×8-inch square pan with aluminum foil and spray lightly with cooking spray so the bars lift out cleanly. The foil also makes slicing and storing much easier — cool bars lift right out for neat cutting. Make the peanut base: In a large microwave-safe bowl combine 1 heaping cup creamy peanut butter, 1/2 cup light corn syrup, 1/2 cup granulated sugar, and 1/4 cup packed light brown sugar. Microwave on high for 1 minute, stir thoroughly to dissolve sugar. Return to microwave for another minute, stir again, then microwave 30 seconds more — about 2 1/2 minutes total. The goal is a smooth, glossy mixture. Stir in 1 tablespoon vanilla and then fold in 3 1/2 cups Special K cereal until evenly coated. Pack into the pan: Turn the cereal mixture into the prepared pan and press down firmly with a spatula or the back of a measuring cup to compact the bars. You want them tightly packed so they hold shape when sliced — but not so compressed that they become rock-hard. Prepare the topping: In a medium microwave-safe bowl combine 1 3/4 cups semi-sweet chocolate chips and 1/4 cup creamy peanut butter. Microwave 30 seconds, stir, then heat in 20–30 second intervals until melted and smooth (about 1 1/2–2 minutes). Stir thoroughly for an even glaze. Assemble and top: Pour the melted chocolate-peanut mixture over the pressed cereal layer, smoothing lightly with a spatula. Scatter about 1 cup of bite-sized candy pieces evenly across the chocolate while it is still warm so they adhere. Be generous — the candies provide great texture contrast. Set and slice: Cover the pan loosely with foil and let sit at room temperature for about 4 hours or until the chocolate is fully set. If you’re in a hurry you can refrigerate to speed setting, but it can cause minor surface bloom or condensation when brought back to room temperature (cosmetic only). Once set, lift from the pan using the foil and slice into 9 bars with a sharp knife. Serve at room temperature for best texture.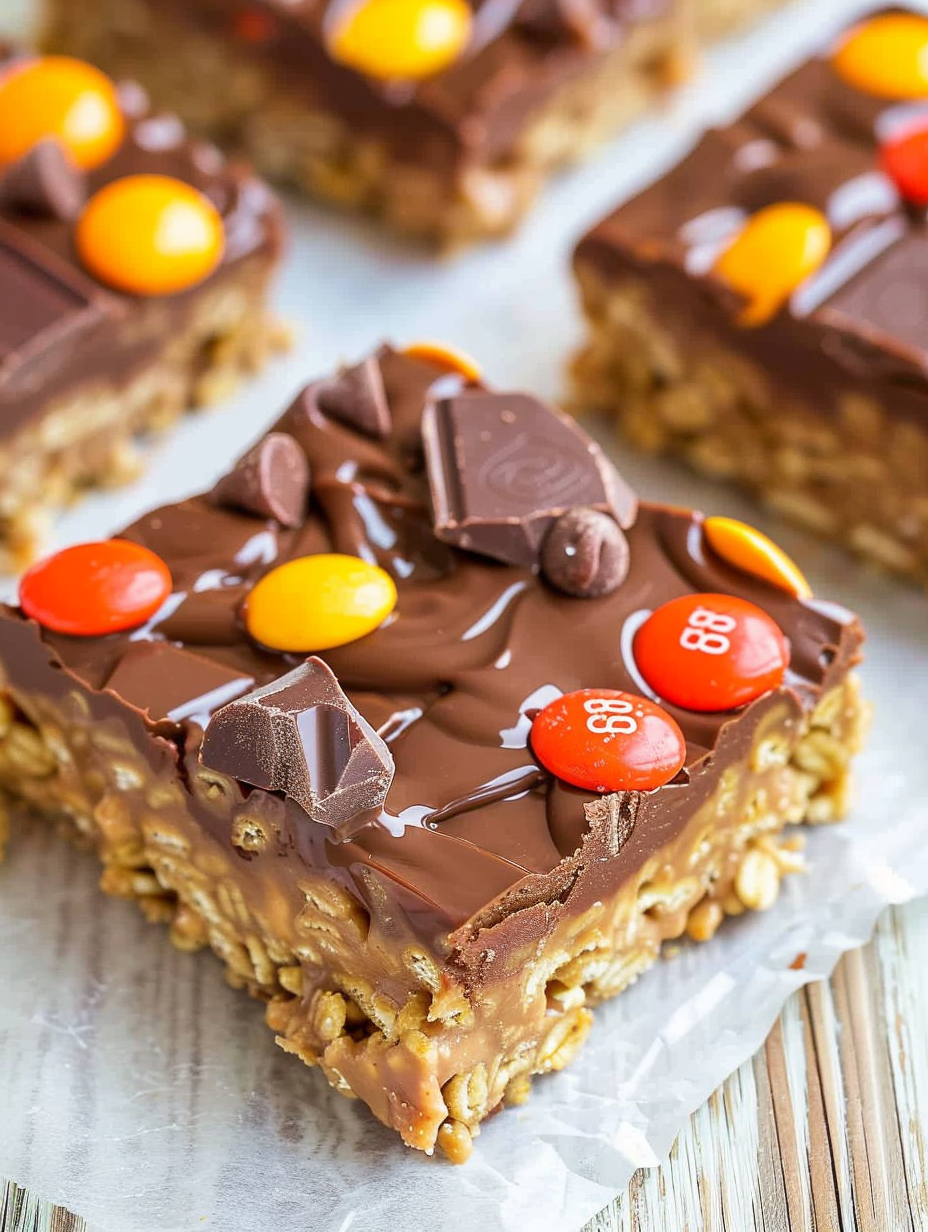
You Must Know
- Storage: Store airtight at room temperature up to 1 week, refrigerate up to 1 month, or freeze up to 6 months.
- Setting time: Plan for roughly 4 hours at room temperature for the chocolate to fully firm; refrigeration speeds this but may cause slight surface bloom.
- Allergens: Contains peanuts, dairy from chocolate and likely candies, and gluten from Special K cereal.
- Texture: The corn syrup and sugars create a chewy, dense interior — this is intentional and is unlike light rice-krispie bars.
- Portioning: This recipe yields nine large bars; cut smaller for more servings or to reduce calories per piece.
My favorite aspect is the nostalgic hit of candy pieces that make every bar feel like a mini treat box. I once served these at a backyard barbecue and a guest compared them to a cross between candy bars and homemade peanut squares — the perfect compliment. The texture contrast between the soft, chewy base and the crisp candies is what keeps people coming back for one more bite.
Storage Tips
Store the bars in a single layer or between sheets of parchment in an airtight container at room temperature for up to one week. For longer storage place them in the refrigerator for up to one month — bring them to room temperature before serving so the chocolate softens and the chewiness returns. If freezing, individually wrap bars in plastic wrap and place in a freezer-safe container for up to six months; thaw overnight in the fridge, then sit at room temperature for 30–60 minutes before serving. Use foil with care when lifting out of the pan to keep edges intact when slicing.
Ingredient Substitutions
If you can’t find Special K, plain corn flakes or lightly crushed chow mein noodles make suitable substitutes for crispness — use a 1:1 volume swap. To reduce sugar intensity, replace the granulated sugar with 1/3 cup sugar plus 2 tablespoons honey (note: honey will slightly alter texture). For a gluten-free version, choose a gluten-free puffed rice or certified gluten-free cereal in place of Special K and check candy labels. Swap semi-sweet chips for dark chocolate for less sweetness, or white chocolate for a sweeter finish; adjust candy pieces to preference.
Serving Suggestions
Serve bars at room temperature alongside coffee or milk — they’re rich, so small portions pair best with something refreshing. Garnish with a light dusting of flaky sea salt for a sweet-salty profile, or drizzle additional melted peanut butter or caramel over the top for a more decadent presentation. These also work well as party finger food—cut into bite-sized squares and display on a platter with other no-bake treats. They’re charming in gift boxes tied with twine for neighbor gifts and holidays.
Cultural Background
Peanut butter and chocolate is a classic American pairing rooted in simple, accessible ingredients. No-bake cereal bars have been a staple in U.S. home kitchens for decades due to their speed and kid-friendly appeal; this version is a modern twist that borrows the candy-studded approach from beloved American candy bars. Using corn syrup and brown sugar for texture harkens to candy-making techniques while the familiar cereal base keeps it homey and nostalgic.
Seasonal Adaptations
In the holidays swap candy choices to match the season — peppermint bits in winter, candy corn in fall, or pastel M&M pieces for spring. For summer gatherings, add chopped toasted peanuts on top for a roastier flavor, and consider using a dark chocolate top to balance the heat of outdoor events. During colder months I sometimes add a pinch of cinnamon or a teaspoon of espresso powder to the peanut base to deepen the flavor and add warmth.
Meal Prep Tips
These bars are excellent for make-ahead dessert prep: assemble and set them up to 1 month in the fridge or up to 6 months in the freezer. Cut and individually wrap for lunchbox treats or quick grab-and-go snacks. When prepping for a week of desserts, store in a single-layer airtight container with parchment between layers to prevent sticking. If you plan to freeze, flash-freeze the pan uncovered for 1 hour before wrapping to prevent distorted candy placement.
These Chocolate Peanut Butter Candy Bars are simple, nostalgic, and endlessly adaptable — a no-fuss recipe that lets you be generous with candy and creative with flavors. Make a batch, share with friends, and enjoy the smiles that follow.
Pro Tips
Press the cereal mixture firmly but not overly tight so bars hold together yet remain soft.
Use stable creamy peanut butter (Jif or Skippy) for best texture; natural peanut butter will separate and change consistency.
Allow the chocolate to set at room temperature to avoid condensation; refrigerate only if necessary.
This nourishing chocolate peanut butter candy bars recipe is sure to be a staple in your kitchen. Enjoy every moist, high protein slice — it is perfect for breakfast or as a wholesome snack any time.
Tags
Chocolate Peanut Butter Candy Bars
This Chocolate Peanut Butter Candy Bars recipe makes perfectly juicy, tender, and flavorful steak every time! Serve with potatoes and a side salad for an unforgettable dinner in under 30 minutes.
Ingredients
Bars
Topping
Instructions
Prepare Pan
Line an 8×8-inch square pan with aluminum foil and spray lightly with cooking spray. This ensures easy removal and clean slices later.
Heat Peanut Mixture
In a large microwave-safe bowl combine the peanut butter, corn syrup, granulated sugar, and brown sugar. Microwave 1 minute, stir; microwave 1 more minute, stir; microwave 30 seconds, stir. Total about 2 1/2 minutes until glossy and combined.
Add Vanilla and Cereal
Stir in the vanilla extract, then fold in Special K cereal until evenly coated. Work quickly before mixture cools and becomes less pliable.
Pack into Pan
Turn mixture into prepared pan and press down firmly with a spatula or back of a measuring cup so the base is compact and even.
Make Chocolate Topping
In a medium microwave-safe bowl combine chocolate chips and 1/4 cup peanut butter. Microwave 30 seconds, stir, then heat in 20–30 second increments until melted and smooth (about 1 1/2–2 minutes).
Assemble and Set
Pour melted chocolate mixture over the packed base and smooth lightly. Scatter bite-sized candy pieces evenly across the surface. Cover and let set at room temperature for about 4 hours or until chocolate is firm.
Slice and Serve
Lift bars from pan using the foil, slice into 9 squares with a sharp knife, and serve at room temperature for best chewiness and flavor.
Last Step: Please leave a rating and comment letting us know how you liked this recipe! This helps our business to thrive and continue providing free, high-quality recipes for you.
Nutrition
Did You Make This?
Leave a comment & rating below or tag
@yummique on social media!
Categories:
You might also like...

Cheesy Zucchini Rollatini Bake
Tender grilled zucchini wraps basil ricotta, bathed in marinara and mozzarella, baking into a bubbly, lighter Italian comfort dinner ready in 30 minutes.

Air Fryer Zucchini and Squash
Crisp-edged, tender-in-the-middle zucchini and yellow squash made in 15 minutes with pantry spices. A vibrant, veggie-forward side everyone devours.

Chicken Meatball Parmesan
Tender chicken meatballs simmered in rich marinara and blanketed with melty mozzarella, bringing all the flavors of chicken parm in cozy, bite-sized form.
Did You Make This?
Leave a comment & rating below or tag @yummique on social media!
Rate This Recipe
Share This Recipe
Enjoyed this recipe? Share it with friends and family, and don't forget to leave a review!
Comments (1)
This recipe looks amazing! Can't wait to try it.
Comments are stored locally in your browser. Server comments are displayed alongside your local comments.

Hi, I'm Amira!
What's Popular

30-Minute Meals!
Join to receive our email series which contains a round-up of some of our quick and easy family favorite recipes.