
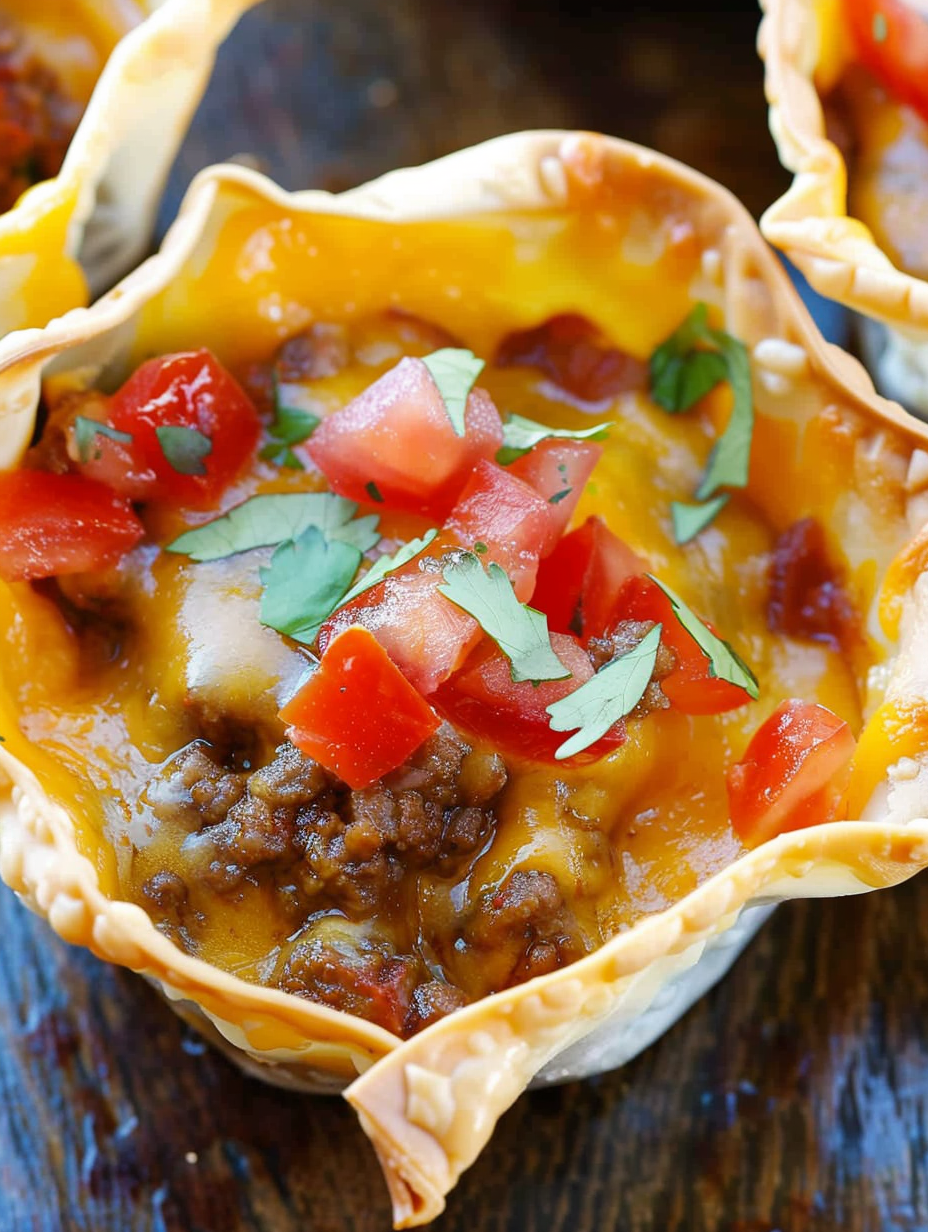
Crunchy Taco Cups

Mini crunchy taco cups made in a muffin tin—perfect for weeknight dinners, parties, or a fun family meal. Ready in about 30 minutes and crowd-pleasing.
Why You'll Love This Recipe
- Ready in roughly 32 minutes from start to finish, these cups turn pantry staples into something special without long prep or complicated steps.
- Each cup is perfectly portioned—12 individual servings—so it’s great for parties, kids, and portion control at dinner.
- Wonton wrappers bake up crispier and flakier than tortillas, delivering a satisfying crunch that holds up to fillings.
- Make-ahead friendly: the filling can be prepared a day in advance, and the assembled cups freeze well for up to 3 months.
- Customizable for dietary needs—use ground turkey for lower fat, or gluten-free wrappers to accommodate intolerance.
- Uses common, inexpensive ingredients so it’s budget-friendly without sacrificing flavor or presentation.
I’ve brought these to neighborhood potlucks and family gatherings; watching kids and adults alike bite through the crisp edge and find molten cheese and savory beef inside never gets old. My partner calls them “party tacos in a cupcake wrapper,” and honestly, that description sells them short—the texture and balance of flavors genuinely feel elevated compared with a regular taco shell.
Ingredients
- Lean ground beef (1 lb): Choose 90/10 or 93/7 for less grease; browning well and draining excess fat prevents soggy cups and concentrates flavor. Grass-fed or conventional both work—cook until no pink remains.
- Taco seasoning (1 envelope / 3 tablespoons): A pre-mixed packet adds convenience and balanced spices; if making homemade, use chili powder, cumin, paprika, onion powder, garlic powder, and a pinch of salt.
- Ro-Tel Diced Tomatoes & Green Chiles (10-oz can, drained): Adds both acidity and gentle heat; drain to avoid excess moisture in the cups. You can substitute plain diced tomatoes if you prefer less heat.
- Sharp cheddar cheese (1 1/2 cups, shredded): A good melting cheese like Tillamook or Cabot gives rich flavor; Mexican blend works well for a more authentic profile. Reserve a little to top the assembled cups.
- Wonton wrappers (24): Look for fresh or refrigerated wrappers; brands like Nasoya are commonly available. Two wrappers per cup create sturdy, multi-layered cups that won’t collapse when filled.
Instructions
Preheat and prepare: Preheat the oven to 375 degrees F and generously coat a standard 12-cup muffin tin with nonstick cooking spray. Ensuring the tin is well-sprayed helps the wonton wrappers release easily; you can also brush lightly with oil if you prefer an even crisper base. Cook the beef: In a medium skillet set over medium-high heat, brown 1 pound of lean ground beef until no pink remains, about 6 to 8 minutes. Break the meat into small pieces for even filling distribution. Drain any excess fat into a heat-safe container, return the pan to the burner, add the taco seasoning and 2 to 3 tablespoons water if the packet recommends it, then stir in and simmer for 1 to 2 minutes to meld the spices. Combine filling: Transfer the cooked beef to a mixing bowl, add the drained 10-ounce can of diced tomatoes and green chiles, and stir to combine. Taste and adjust the seasoning—if it needs brightness, a squeeze of lime or a pinch of salt helps. Let the mixture cool slightly so it won’t sog the wrappers when assembled. Line and layer: Press one wonton wrapper into each sprayed muffin cup, allowing the corners to drape over the edge. Spoon approximately 1.5 tablespoons of the meat mixture into the wrapper, top with 1 tablespoon of shredded cheese, press a second wonton wrapper down gently, add another 1.5 tablespoons of filling and finish with a final layer of cheese (about 1 tablespoon). The two-wrapper method creates a crisp outer shell and a snug interior layer that seals in juices. Bake and check: Bake at 375 degrees F for 11 to 13 minutes, until the edges of the wrappers are golden and cheese is melted. Ovens vary—rotate the pan halfway through baking if your oven has hot spots. Allow the cups to rest in the tin for 2 to 3 minutes before removing; this helps the filling set so the cups keep their shape. Serve: Gently lift each cup from the tin with a small offset spatula or fork and transfer to a serving platter. Serve warm with lime wedges, salsa, sliced avocado, or a drizzle of sour cream. If stacking for a buffet, place on a tray lined with paper towels to catch any grease.
You Must Know
- These cups freeze well for up to 3 months—flash-freeze on a tray, then store in a freezer bag to keep their shape.
- High in protein: each cup contains a satisfying amount of meat and cheese, making them filling and great for kids after activities.
- Storage: refrigerate leftovers in an airtight container for up to 3 days and reheat at 350 degrees F for 8 to 10 minutes to restore crispness.
- Because wonton wrappers are thin, avoid overly watery fillings—drain the tomatoes well and cool the mix before assembling.
My favorite memory with these is a summer backyard party where I made a double batch; they vanished within minutes. Guests loved the compact size and the crisp edge that held up to the juicy filling. The key to success is not overfilling and making sure the wrappers reach the edges of the tin so the cups bake evenly.
Storage Tips
For short-term storage, cool the cups completely and place them in a single layer in an airtight container in the refrigerator for up to three days. To freeze, place cooled cups on a baking sheet lined with parchment and flash-freeze for 30 to 45 minutes, then transfer to a freezer-safe bag and store for up to three months. Reheat from frozen in a 350 degrees F oven for 12 to 15 minutes, or until warmed through, to maintain the crunch. Avoid microwaving leftover cups unless you’re willing to forgo the crisp texture; use the oven for best results.

Ingredient Substitutions
To reduce fat, swap the ground beef for ground turkey or chicken and use a low-fat cheese or reduced-fat Mexican blend. For vegetarian cups, replace meat with seasoned black beans or crumbled tempeh; season beans with the same taco mix and a splash of lime. If you need gluten-free, use gluten-free wonton wrappers or small corn tortillas cut to fit—par-bake the tortilla cups for extra structure. For dairy-free versions, omit cheese or use a plant-based shredded cheese; be aware that melting properties differ and you may need to add a bit more time in the oven.
Serving Suggestions
Serve these as the centerpiece for a casual weeknight meal alongside a crisp cabbage slaw, cilantro lime rice, or a bright tomato-corn salad. For parties, create a topping bar—sour cream, guacamole, pico de gallo, pickled onions, and sliced jalapeños let guests customize. Garnish each cup with a small cilantro sprig and a lime wedge for color and brightness. For a lighter plate, pair two taco cups with a large mixed greens salad and a simple vinaigrette.
Cultural Background
These handheld cups are a playful riff on Mexican flavors adapted to home kitchens. While not traditional in Mexican cuisine, they borrow core elements—seasoned meat, cheese, chiles—and present them in a convenient Americanized format influenced by fusion cooking. Similar approaches appear in Tex-Mex and Southwestern cooking where portability and bold flavors are prized. The use of wonton wrappers reflects a pragmatic, cross-cultural technique: many cooks use available pantry wrappers to achieve crisp texture quickly, a method born from culinary improvisation rather than strict tradition.
Seasonal Adaptations
Adjust fillings by season: in summer, mix grilled corn and chopped roasted poblano into the meat for sweetness and smokiness. In fall, swap tomatoes for pumpkin-spiced black beans with smoked paprika for a cozy note. For winter gatherings, fold in chiles in adobo or swap cheddar for a sharper aged cheese to stand up to heartier sides. Garnishes like fresh pico de gallo are best in summer, while pickled jalapeños and roasted root-vegetable salsas are great in colder months.
Meal Prep Tips
Prepare the filling ahead: cook the beef and mix it with drained tomatoes up to 48 hours in advance—store tightly covered in the refrigerator. Assemble uncooked cups in the muffin tin, then cover the tray tightly with plastic wrap and refrigerate for up to 24 hours; bake as directed when ready. For busy weeks, freeze pre-assembled cups on a tray, then transfer to a freezer bag. Label with the bake temperature and time; reheating from frozen takes about 12 to 15 minutes at 350 degrees F to restore crispness.
These crunchy cups are the kind of recipe that invites improvisation. Once you know the basic technique—crispy shell, compact filling, short bake—you can riff on flavors endlessly. Make them your own and enjoy the smiles they bring around the table.
Pro Tips
Drain canned tomatoes thoroughly to avoid soggy cups.
Use two wonton wrappers per cup for a sturdier, multi-layered shell.
Let assembled cups rest in the tin for 2–3 minutes before removing to help them set.
Rotate the muffin tin halfway through baking if your oven has hot spots.
This nourishing crunchy taco cups recipe is sure to be a staple in your kitchen. Enjoy every moist, high protein slice — it is perfect for breakfast or as a wholesome snack any time.
FAQs about Recipes
Can I make these ahead and freeze them?
Yes. Assemble and freeze on a tray, then transfer to a freezer bag for up to 3 months. Reheat from frozen at 350°F for 12–15 minutes to retain crispness.
What’s the best way to reheat leftovers?
If you must microwave, do so briefly and then finish in a preheated oven or toaster oven for 3–4 minutes to crisp the edges.
Tags
Crunchy Taco Cups
This Crunchy Taco Cups recipe makes perfectly juicy, tender, and flavorful steak every time! Serve with potatoes and a side salad for an unforgettable dinner in under 30 minutes.
Ingredients
Filling
Wrappers & Cheese
Instructions
Preheat and prepare
Preheat oven to 375°F and generously coat a standard 12-cup muffin tin with nonstick cooking spray.
Brown the meat
In a skillet over medium-high heat, brown 1 lb ground beef until no pink remains, about 6–8 minutes. Drain excess fat, return to pan, and stir in taco seasoning according to packet directions.
Combine filling
Transfer beef to a bowl, add drained 10-oz can of diced tomatoes and green chiles, stir to combine, and let cool slightly to avoid sogging wrappers.
Assemble cups
Line each muffin cup with one wonton wrapper, add 1.5 tablespoons of meat, top with 1 tablespoon cheese, press a second wrapper, add another 1.5 tablespoons of meat and finish with 1 tablespoon cheese.
Bake and rest
Bake at 375°F for 11–13 minutes until wrappers are golden and cheese is melted. Let cups rest in the tin for 2–3 minutes before removing.
Last Step: Please leave a rating and comment letting us know how you liked this recipe! This helps our business to thrive and continue providing free, high-quality recipes for you.
Nutrition
Did You Make This?
Leave a comment & rating below or tag
@yummique on social media!
Categories:
You might also like...

Cheesy Zucchini Rollatini Bake
Tender grilled zucchini wraps basil ricotta, bathed in marinara and mozzarella, baking into a bubbly, lighter Italian comfort dinner ready in 30 minutes.

Air Fryer Zucchini and Squash
Crisp-edged, tender-in-the-middle zucchini and yellow squash made in 15 minutes with pantry spices. A vibrant, veggie-forward side everyone devours.

Chicken Meatball Parmesan
Tender chicken meatballs simmered in rich marinara and blanketed with melty mozzarella, bringing all the flavors of chicken parm in cozy, bite-sized form.
Did You Make This?
Leave a comment & rating below or tag @yummique on social media!
Rate This Recipe
Share This Recipe
Enjoyed this recipe? Share it with friends and family, and don't forget to leave a review!
Comments (1)
This recipe looks amazing! Can't wait to try it.
Comments are stored locally in your browser. Server comments are displayed alongside your local comments.

Hi, I'm Amira!
What's Popular

30-Minute Meals!
Join to receive our email series which contains a round-up of some of our quick and easy family favorite recipes.